Restore 8 min read
Cast Iron Electrolysis Tank Setup: The Garage Rig, Step by Step
An electrolysis tank is a plastic tote, washing soda, a steel anode, and a manual battery charger. How to build the garage rust-removal rig, step by step.
This guide has product links. As an Amazon Associate, Seasoned Cast earns from qualifying purchases — it never changes what we recommend.
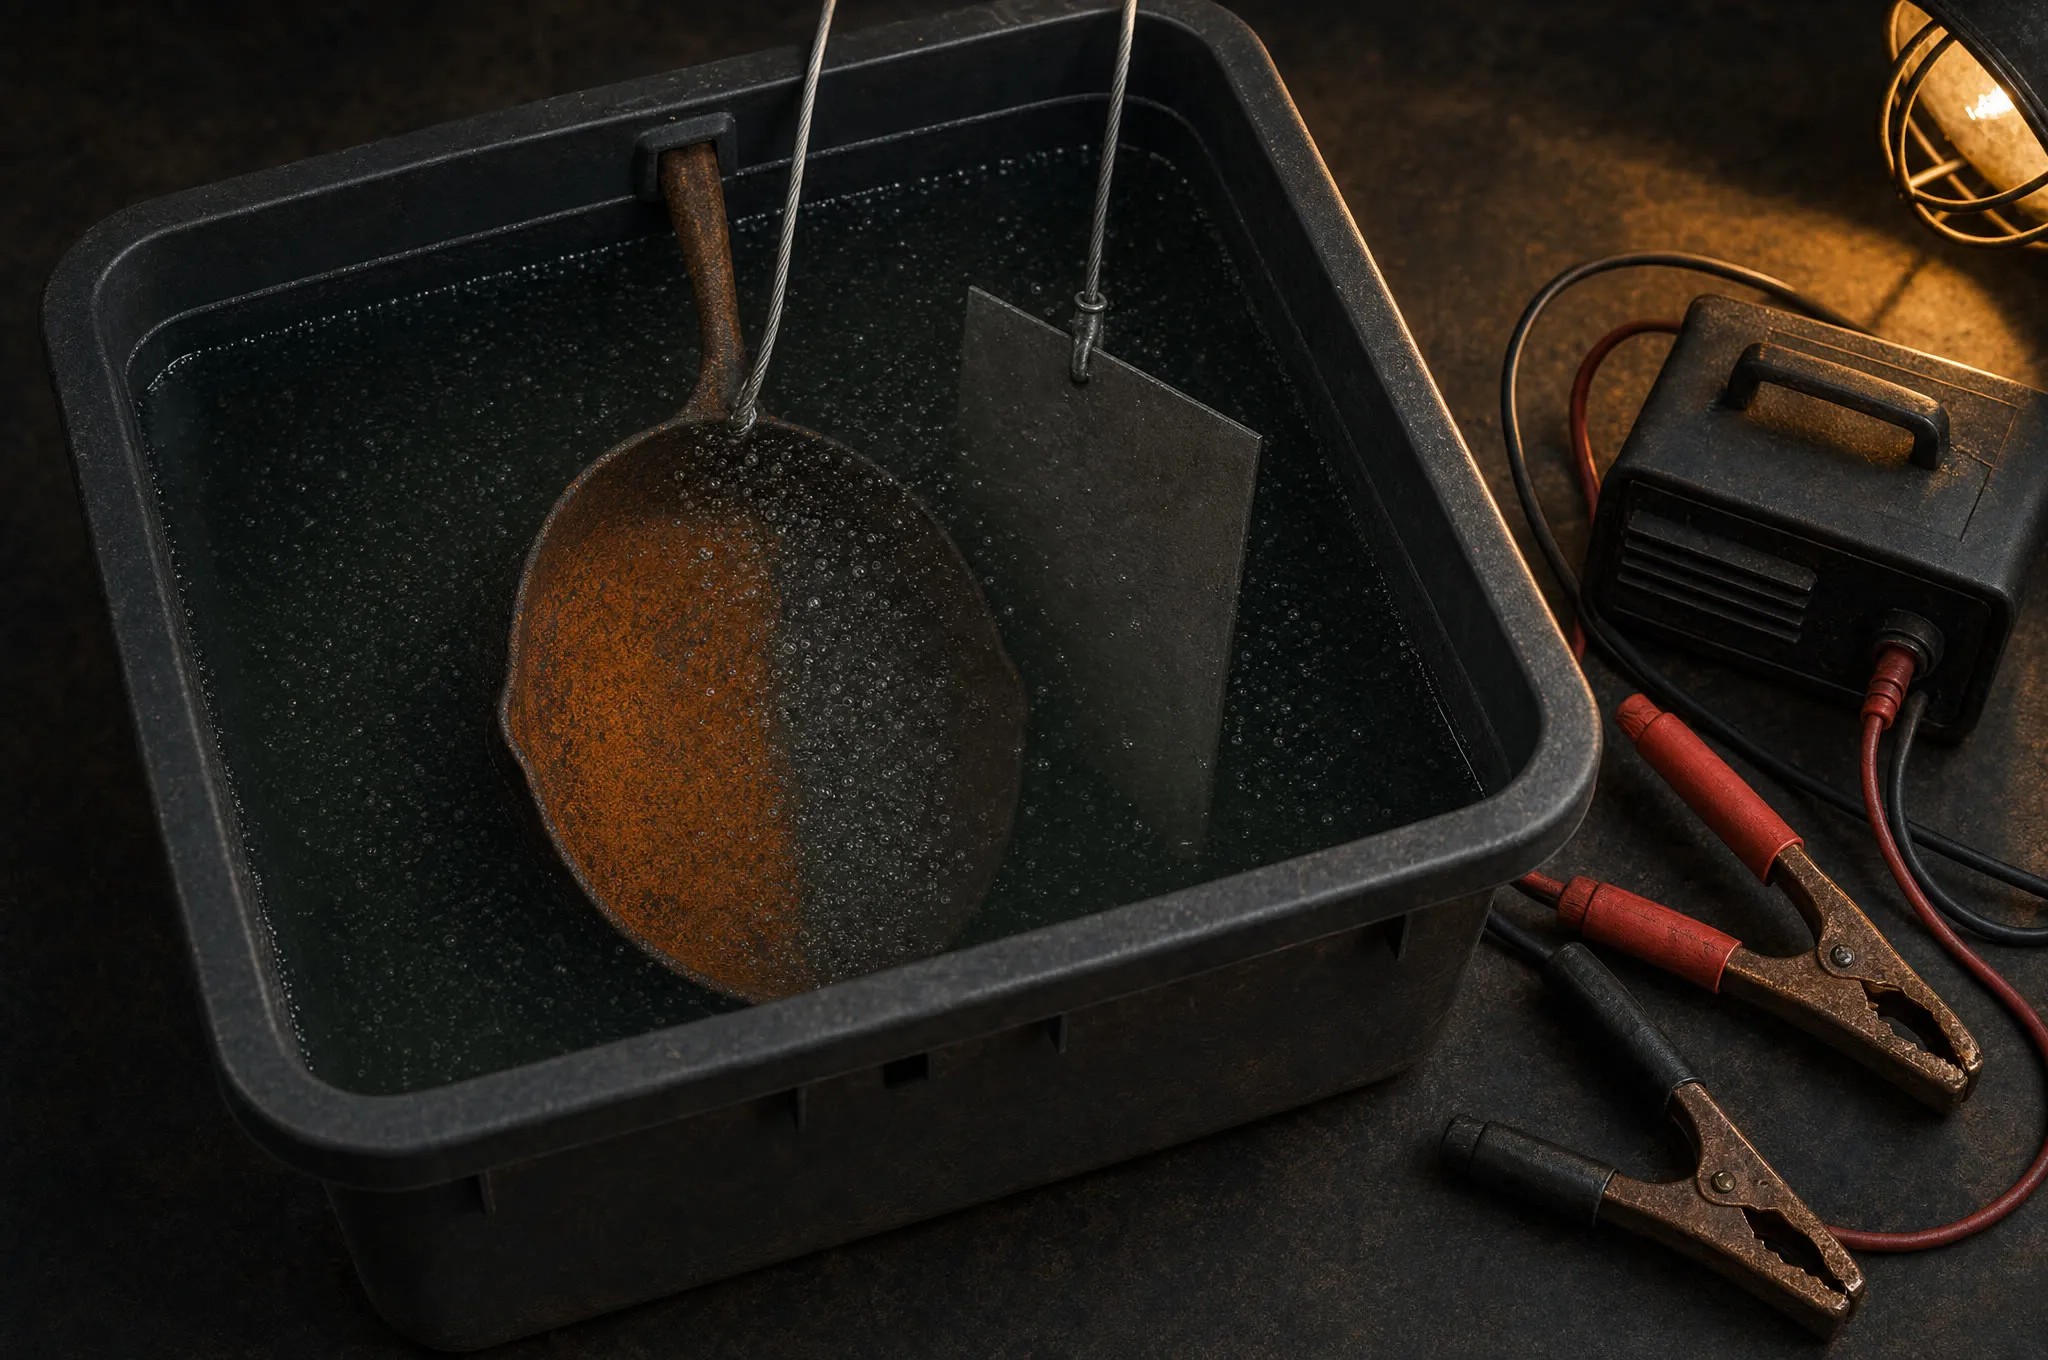
A cast iron electrolysis tank is a plastic tote of water and washing soda, a sacrificial steel anode, and a manual battery charger pushing a few amps through the pan. The current converts rust into a soft gray-black film that scrubs off, and it can’t overshoot — the iron underneath is untouched no matter how long it runs. The parts come from one hardware-store trip, and setup takes about twenty minutes.
If you’re still choosing a method, the rust-removal overview compares electrolysis against vinegar and plain scrubbing. Short version: for a pan that’s orange all over, or a flea-market find under a serious crust, electrolysis is the one that does the work while you sleep — and unlike an acid soak, it can’t eat healthy iron if you forget about it.
The parts list
| Part | What to get | Why |
|---|---|---|
| Tank | Plastic tote or bucket, deep enough to submerge the pan | Plastic doesn’t conduct. Never a metal container — that’s a short circuit with extra steps |
| Electrolyte | Washing soda (sodium carbonate), about a tablespoon per gallon | Makes the water conduct |
| Anode | Plain steel: rebar, a steel plate, an old lawnmower blade | The sacrificial piece the rust migrates toward |
| Power | A manual battery charger | Pushes the current. Smart chargers refuse the job |
| Suspension | A scrap of wood across the tote, plus steel wire | Hangs the pan so it never touches the anode |
Washing soda, not baking soda
Washing soda is sodium carbonate — it’s in the laundry aisle, sold as a detergent booster. Baking soda is sodium bicarbonate, a different molecule and a noticeably weaker electrolyte for this job. To be honest about it: a tank mixed with baking soda isn’t dangerous and will still bubble along, just slowly. Washing soda is simply the right tool, and it’s cheap.
Mix roughly a tablespoon per gallon of water and stir until it dissolves. Don’t bother going stronger — once the water conducts, the charger is the bottleneck, not the soda.
The anode: plain steel, and only plain steel
The anode is the piece the tank eats instead of your pan. Rebar is the classic choice — cheap, all steel, easy to bend into an L that hooks over the tote wall. A flat steel plate works even better, because more surface area facing the pan means more current and a faster run. Whatever you use, expect it to crust up orange, pit, and eventually get consumed. That’s its job.
Build the tank
- Mix the electrolyte. Fill the tote deep enough to cover the pan completely, then stir in the washing soda. Warm water dissolves it faster; beyond that, temperature doesn’t matter.
- Rig the anode. Hook the rebar over the side, or lean the plate against the tote wall, mostly submerged. Leave a couple of inches of clearance from where the pan will hang. The anode and the pan must never touch — that’s a dead short.
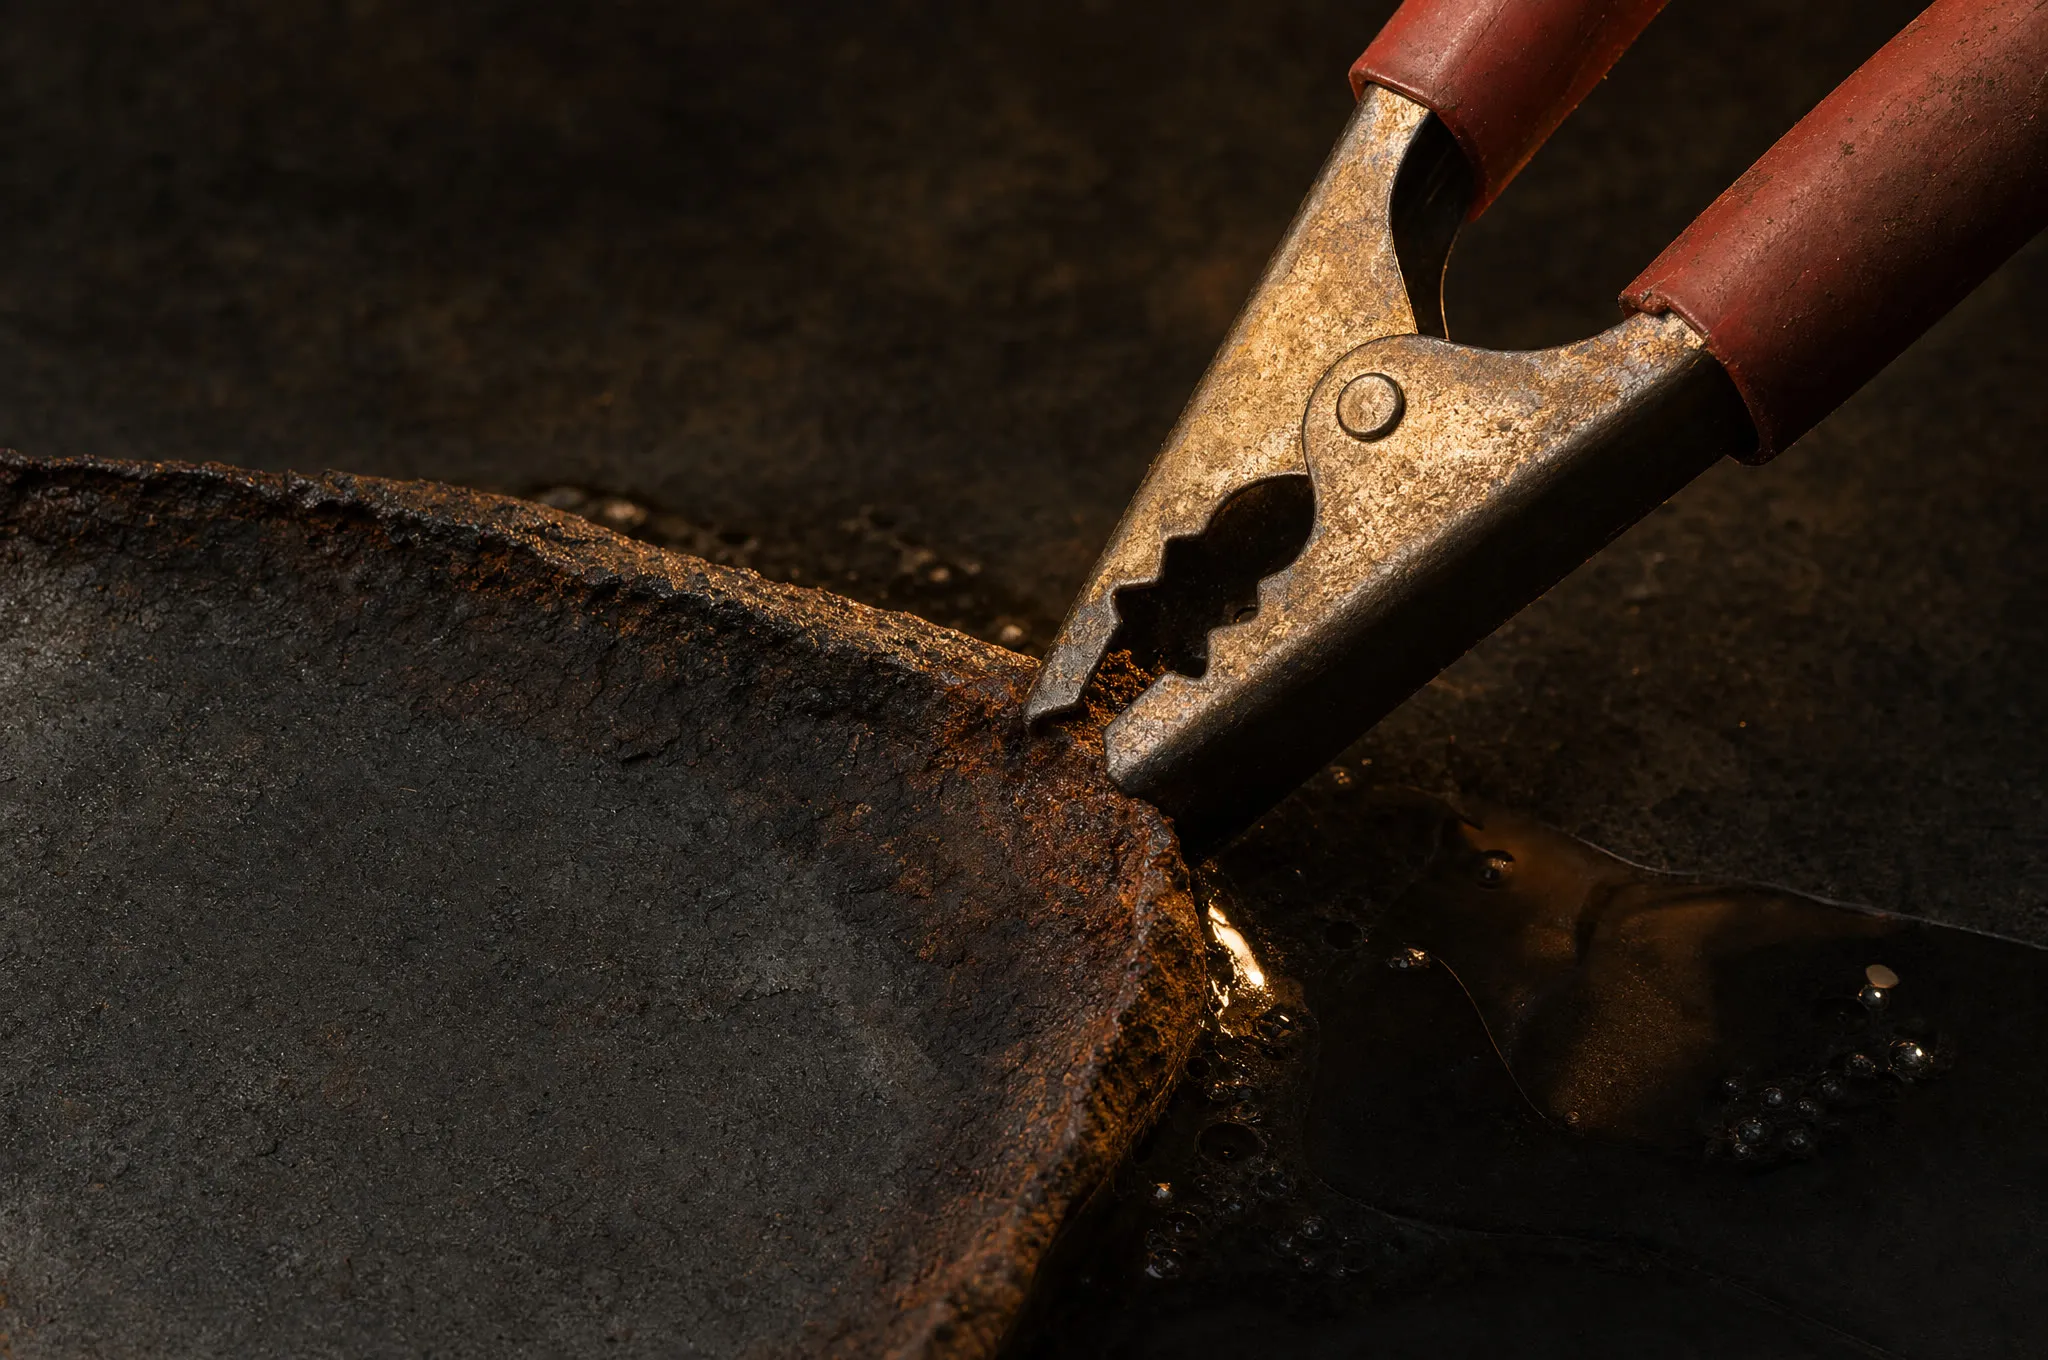
- Hang the pan. Lay the wood scrap across the top of the tote and hang the pan from it with steel wire, fully submerged. File or sand a small bright spot on the pan — a bare-metal patch on the handle works — because current flows badly through rust, and the clamp needs clean contact.
- Connect the clamps — polarity is the whole game. Black negative clamp on the pan. Red positive clamp on the anode. Negative to the pan you’re saving, positive to the steel you’re sacrificing. Reverse them and the tank eats your pan instead. Clamp with the charger unplugged, and keep both clamps above the waterline — a submerged clamp corrodes fast, and the positive one gets devoured.
- Power on. Plug the charger into a GFCI outlet and set it to a manual charge setting — somewhere in the 2–10 amp range is the normal territory. Within a minute you should see fine bubbles streaming off the pan.
A note on the charger, because this trips people up: it must be an old-style manual charger, or at least one with a manual mode. Modern smart chargers look for a battery’s voltage before they’ll deliver current; an electrolysis tank reads as a fault, and they refuse to output anything. Don’t chase big numbers on the meter either — actual draw depends on your soda mix, anode size, and spacing, and a few amps showing is normal and plenty. More amps runs faster, but low and slow overnight lands in the same place.
The line-of-sight rule
Electrolysis cleans by line of sight. The surfaces of the pan directly facing the anode clean fast; the far side barely cleans at all. One rebar stick on one side of the tote will strip one face of the skillet and leave the other orange.
Two fixes. The simple one: run the tank, then flip or rotate the pan and run it again. The better one: use several anodes — three or four rebar pieces spaced around the tote wall, wired together to the positive clamp — so the pan sees steel in every direction. Either way, start with the worst rust facing the anode.
Running it: what working looks like
Bubbling means it’s working. A steady fizz of tiny bubbles rising off the pan is the signature of current flowing — that gas is hydrogen coming off the piece as the rust converts. No bubbles means no current: check the clamp contact, the bright spot, and the polarity.
Expect the run to slow down over hours. The anode collects a crust of orange-brown gunk — that’s material that used to be on your pan — and as it fouls, current drops. Pulling the anode and hitting it with a wire brush every few hours keeps the speed up, but it’s optional; a fouled tank still works, just slower. The water itself turns murky with rusty scum on top. Ugly is normal. The solution doesn’t wear out — top up the water and keep using it.
Timing: light, even rust comes clean in a few hours. A heavily crusted piece runs overnight. There is no overcooking — when in doubt, leave it in.
What comes out of the tank
The pan comes out looking worse than it went in: matte black-gray, streaked, wearing a soft dark film. That film is the payoff — the rust has been converted to a loose black form (mostly magnetite) that no longer grips the iron. Scrub the pan under hot running water with a Scotch-Brite pad or a stiff brush and it wipes away to clean gray metal.
Two honest limits. Pitting doesn’t disappear — the rust that caused it is gone, but the craters it dug remain, and no method un-digs them. And thick old seasoning only partially lets go in the tank; for a pan buried under decades of baked carbon, run a lye bath first for the crud, then electrolysis for the rust underneath. That two-step order is the backbone of a full restoration.
If a few stubborn orange patches survive the scrub, back in the tank they go — rotated to face the anode this time.
The flash-rust window: move fast
Bare iron fresh out of a water bath starts rusting again in minutes. You’ll see it happen — a faint orange blush blooming while the pan sits on the counter. That’s not a failure; that’s what naked iron does in air, and it’s why the last step of an electrolysis run is never “set it down and have lunch.”
The sequence: rinse, towel-dry, then straight onto a stove burner or into a warm oven until the pan is bone dry and too hot to touch. Wipe on a thin coat of oil the moment it’s dry, and season it in the oven the same day. If a light blush appears in the gap between sink and stove, a quick Scotch-Brite pass takes it off — then keep moving.
When the pan is seasoned and back on the stove, the tank just waits. Brush the anode, put the lid on the tote, and the rig is ready for the next flea-market rescue — that’s the whole point of building it. For where electrolysis fits in the bigger sequence, start at the Restore section.
FAQ
Will electrolysis damage my cast iron pan?
No — with the polarity right, it can't. The pan is the protected electrode: current converts the rust and leaves the iron alone, no matter how long the tank runs. Any pitting you see afterward was already there under the rust. The one way to hurt the pan is reversing the clamps, which makes the pan the sacrificial piece — so check twice: negative on the pan, positive on the anode.
Can I use baking soda instead of washing soda?
It conducts, so the tank will limp along, but sodium bicarbonate is the weaker electrolyte and the run will be slow. If the store is out of washing soda, make your own: spread baking soda on a sheet pan and bake it at 400°F for about an hour. It gives off water and carbon dioxide and converts to sodium carbonate — actual washing soda.
How long should the pan stay in the tank?
A few hours handles light, even rust. A heavily crusted piece runs overnight, sometimes longer with a flip partway through. You can't over-run it — pull the pan, scrub, and put it back in if patches remain. Long runs cost you anode, not pan.
Does electrolysis remove old seasoning and carbon buildup too?
Partially. It loosens seasoning and lifts some crud, but it's a rust tool first. For a pan wearing decades of baked-on carbon, a lye bath does that job better — the classic full-restoration order is lye first for the crud, then electrolysis for the rust underneath.